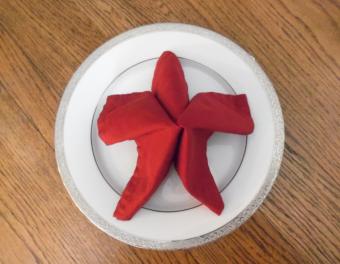
Fold with Fabric: Origami Iris

The iris (or lily) is an ancient flower design and a good beginner model. Other flower designs you might try with practice include the lotus, bellflower, rose, dahlia, tulip, and orchid. For this tutorial, the choice is the iris.
To start, you'll need a few supplies. Because fabric is soft, it will need to be stiffened. To do so, use a water-based stiffener, which simply needs to be brushed on to the fabric and dried.
Other supplies: scissors, an iron, and origami paper to measure.
Step 1: Trim the Fabric

Cut your fabric to be a bit larger than what you'll use to fold. This way, you have room to trim it after the stiffener dries. For this tutorial, a 6" square will be used to fold the iris. This piece of fabric is about 8" square.
Step 2: Apply the Stiffener

Apply the stiffener to your fabric and let it dry. Be sure to remove the fabric from the surface on which you applied the stiffener; otherwise, they will stick together. Elevate it somehow, with a screen, rocks, etc.
Step 3: Ironing

Iron the fabric to make it softer, yet still "stiff." Use a paper towel to absorb any residue stiffener.
Step 4: Cut Your Square

For this project, a standard 6" square was used as a template. Once you have your square, start to fold. Your creases should hold, just like with paper.
Step 5: Begin Your Iris

Start by making a water balloon base (also known as a water bomb).
Step 6: Fold Triangles Down

Take a flap and squash it down the center; flatten into a kite. Repeat for remaining three flaps.
Step 7: Fold Up

Next, fold the outside corners toward the center; crease and unfold.
Step 8: Fold Down

Next, fold the top tip down to the bottom, crease, and unfold. These will create the lines for the next step.
Step 9: Fold Up and Flatten

Lift the top layer of the model and pull up towards the top tip, using the creases of Steps 7 and 8 to define the shape. Squash down and flatten. Repeat for remaining three sections.
Step 10: Smaller Kite

By now, your model should look like this.
Step 11: Pull Down

Next, pull the top layer of the kite down, creating a diamond. Repeat for remaining three sections. Rotate model so that the open part is at the top.
Step 12: Fold to Center

Fold the outer flaps toward the center, crease, and flatten. Repeat for remaining three sections.
Sign up for our newsletter featuring all the latest stories and products we love.
Step 13: Almost Done

Your model should now look like this.
Step 14: Create Petals

Now, holding the base, pull the top sections down, all the way around -- four times.
Step 15: Your Iris

And viola, you have an iris!
Step 16: Add a Stem

Tie a stem on if you'd like. This one is made from a bamboo skewer and yarn.
Step 17: Display

With these fabric origami flower instructions, you should be set to make your own bouquet. Remember, to make your fabric more foldable, add a stiffener at the start.
Other ways to fold fabric origami include using rubber bands to secure sections, as well as applying decorative fasteners like buttons, pins, or floss. With a bit of sewing, you might also tack the sections as you fold, securing each petal in place until you're finished.


