Easy Kirigami Flower Patterns

A simple flower Kirigami pattern is not hard to create, making this a good project for young children interested in paper crafts or novice adult crafters interested in learning more about paper cutting techniques.
Step 1

To begin making your flower, fold a square sheet of origami paper in half by bringing the top towards the bottom half.
Step 2

Fold the paper in half again, bringing the left side to the right of the paper.
Step 3

Fold the paper in half again diagonally. You will have a paper triangle with the bottom layers extending slightly past the top layers.
Step 4

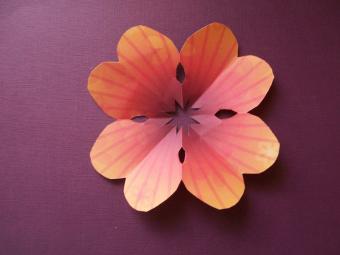
Cut the folded paper into the shape of a flower petal. For a traditional rounded flower, your cut will resemble an ice cream cone. Cut the folded paper into a slightly triangular shape for a contemporary look.
Step 5

Unfold the paper to reveal your flower Kirigami pattern.
Sign up for our newsletter featuring all the latest stories and products we love.
Step 6

If you want to make a variation of the Kirigami flower, try cutting extra notches into the center and sides of your design. This will give you a cross between a flower and a snowflake.
Step 7

Another way to add more interest to your flower Kirigami pattern is to cut several flower shapes from progressively smaller squares of coordinating paper. Glue them together or attach a scrapbooking brad through the center of the smallest flower to make a pretty decoration for a wrapped gift or handmade greeting card.
If you enjoyed this easy Kirigami project, check out the LoveToKnow Origami slideshow tutorial on How to Make a Paper Doll Chain.


