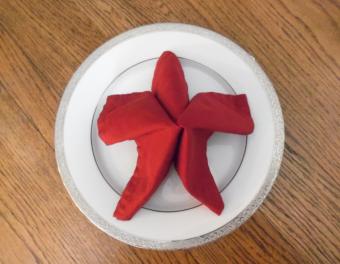
Origami is a great way to show someone you care during the holiday season with a thoughtful, handmade gift. Christmas stars are an example of how this ancient Japanese art form can fit into the holiday theme.
Simple Single Sheet Origami Star
The easiest origami star is created from a single sheet of square origami paper. To begin, you must make a balloon base form.
1. To make the balloon base for, start with the colored or patterned side of your paper face up. Fold the paper in half vertically. Unfold, then fold the paper in half horizontally. Unfold.
2. Turn the paper over so the colored or patterned side is face down. Fold the paper in half diagonally. Unfold, then fold the paper in half along the other diagonal. Unfold to reveal the finished crease pattern.
3. Using the middle vertical folds, carefully collapse the paper into a layered triangle shape.

4. Fold the top left corner so the edge is 2/3 of the way to the right side, then fold this portion back onto itself so the inner edge of the paper lines up with the middle vertical crease. This is called a step fold. Step fold the right corner in the same fashion. Flip the paper over and repeat this process on the back left and right corners. When you're finished, your paper should look like a large "V" shape.

5. Bring the top layer down, flattening as needed.

6. Flip the paper over to reveal your finished origami star.

Modular Origami Star
You will need three sheets of square origami paper for this project. Cut each sheet in half to make a total of six rectangles. You will only use five rectangles to make your star, so the last rectangle can be saved for another project.
1. Start with the white side of your paper face up. Fold the paper in half horizontally, then unfold. Fold it in half vertically. Unfold. Bring the left and right sides in to meet the middle vertical crease. Unfold. If you've completed this step properly, you now have a grid with eight squares.
2. Fold the far right top and bottom corners in to meet the middle horizontal crease. This makes a triangular point. Bring the triangle point over so the tip of the triangle is touching the middle of the first vertical crease on the left side of your paper.

3. Turn your paper over, then fold the far right corners in to meet the middle horizontal crease. Repeat these corner folds a second time.

4. Turn your paper over so you're back to the original position, then rotate the paper 90 degrees. Fold the bottom horizontal edge under the triangle flap. Fold the bottom edge up under the flap two more times, making a progressively thinner strip. This strip is what you'll use to connect all the points of your star.

5. Continue making units using the rest of your paper rectangles until you have five identical folded points. Start connecting the points by tucking the thin strip of the first point inside the front pocket of the second point. The points are connected at a slight angle, just as they would be in a finished five point star. Flip the star over and slide the thin strip of the second point into the back pocket on the first point.

6. Continue connecting points in this fashion until the star is complete. No tape or glue is needed to hold the model together. The finished five-pointed star is ideal for hanging above a Christmas tree or in a doorway at Christmastime.
Puffy Origami Star
These tiny puffy origami stars are often called origami lucky stars. For Christmas, they are typically used to fill clear glass ornament balls or strung together to make a garland for the tree. Each star is made from a strip of paper cut to measure 11" x 0.5".
1. To begin, make a loop with your paper and pass the short end into the loop to make a standard overhead knot. Press gently to partially flatten the paper. Do not flatten the paper all the way. This gives you a pentagon shape.

2. Slip the short end of the paper into the pentagon, trimming if necessary to make it fit.

3. Wrap the long end of the paper around each side of the pentagon. After each wrap, check to make sure the paper lines up with the edges of the original shape. When you reach the end of the pentagon, tuck in the remainder of the paper. You can use scissors to trim the paper to fit if needed.

4. Shape the pentagon by gently pinching each edge with your fingernail. This makes it puff out into the desired star shape.

Do not be discouraged if your first few stars are not perfect. Most people need to make several stars before they get the shaping technique correct. However, if you're having trouble, you may find it useful to use the Alex Toys Lucky Star Maker to shape your stars.
More Origami Stars
Can't get enough origami stars? Here are some more designs you may like to incorporate into your Christmas decor:
- German Christmas Stars of Folded Paper: Also known as Froebel stars or Moravian stars, these traditional German Christmas decorations use a combination of folding and weaving to make the finished eight-point star design.
- Origami Star Ornament: Origami ninja stars, a popular paper toy for children, can be folded from metallic paper and decorated with beads to make pretty decorations for your tree.
- Large Modular Origami Star: These oversize origami stars would be lovely to hang in your window to celebrate the holidays.
Personalize Your Holiday Decor
For the best results when creating origami stars, use a variety of different colored paper. Paper that is shiny can be a good option, but be careful with thick papers. The intricacies of folding these stars can make it very difficult to fold them properly if the paper is too thick. Adorn your origami Christmas stars with shiny stickers or hand-drawn designs for a more unique look.