Make an Easy Origami Shirt Card

An origami shirt card is an excellent craft project for Father's Day or the birthday of a special dad, uncle or brother. Choose a paper pattern that is similar to a favorite shirt in his closet, so it truly reflects his personality.
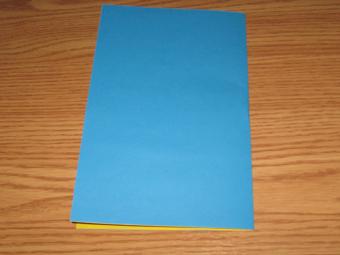
Step 1

Begin with an 8.5 by 11 inch piece of paper.
Step 2
Fold the paper in half and unfold.
Step 3

Fold the paper in half horizontally and unfold.
Step 4

Fold both the top and bottom halves of the paper into the middle crease.
Step 5
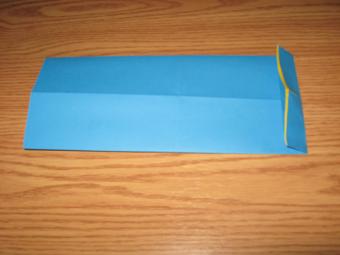
Turn the paper over and fold the right side down, approximately ¼ inch to ½ inch. Flip the paper back over.
Step 6

Fold the corners into the center, aligning them so they are next to each other. This step completes the collar.
Step 7

Using the center vertical crease as a guide, fold the other two corners out, as shown in the picture at the left.
Sign up for our newsletter featuring all the latest stories and products we love.
Step 8

Fold the left side of the paper up until the straight edge is underneath the shirt collar.
Step 9
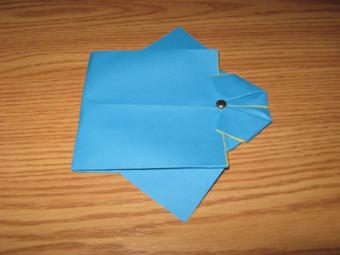
Affix a brass fastener or button to hold the shirt and collar in place.
Step 10

Glue the shirt to a half-folded card. Write a greeting on the shirt, or add buttons or a tie to the shirt and the greeting above or below it.
Find more card ideas in the LoveToKnow interview Origami Note Cards: Interview with Cathy Carl.