Make Traditional Origami Hens

The traditional origami hen, sometimes called the cocotte or pajarita, is a commonly seen figure in origami. It looks best when made with duo-sided paper, although you can also make it using patterned or plain papers.
Step 1

Begin your hen by making a blintz base, sometimes referred to as the cushion base. Fold the paper diagonally to make a triangle, open, and fold the other two corners diagonally and open. Then bring the points into the center and crease to make a blintz base.
Step 2

Turn the paper over. Make another blintz base on the backside of the first base.
Step 3

Open the folded origami paper until it looks like the photograph at the left.
Step 4

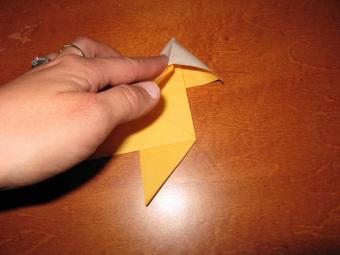
Crease the three opened corners upwards. Begin pulling half the figure upwards, holding onto the unfolded corner.
Step 5

As you pull up, you will push the creased bottom corner towards the right. The photograph to the left shows how this looks as you work to complete the fold. Essentially, you are folding and flattening the figure in half.
Step 5 Completed

The photograph at the left shows a completed Step 5.
Sign up for our newsletter featuring all the latest stories and products we love.
Step 6

Gently pull open the top part of the hen's wings. Inside is the unfolded corner. Pull it out and crease.
Finished Origami Hen

Once you have completed the traditional origami hen, you can make other animal figures. Try your hand at origami dragon folding, making an origami monkey or teach children cat origami for kids.


