Easy Paper Boat Instructions

Step 1

Step 2

Step 3

Step 4

Step 5

Step 6

Step 7

Step 8

Step 9

Step 10

Step 11

Step 12

Paper Boats and More

© 2025 LoveToKnow Media. All rights reserved.

Making a paper boat is a fun activity for kids and adults. Try your hand at making this common design, called the Classic Boat, from Origami Kids. It will be a fun activity for everyone on a rainy or chilly day. When placed in water, the boat can even float!

Start with a rectangular sheet of paper. The one in the photo is 8.5 x 11 inches.

Fold the sheet of paper in half.

Fold the sheet of paper in half again the opposite way and then open.

Fold the bottom and top left corners down until they meet at the crease.

Fold the top half of the right side up and over the bottom of the folds made in the previous step.

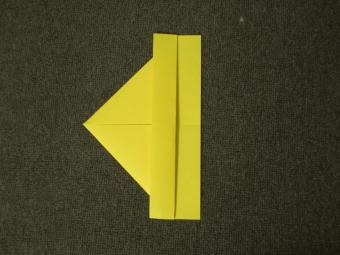
Turn the paper over and fold the visible points from the previous step to the back, forming small triangles. Fold the top and bottom right corners until they meet the sides of the triangles.

Next, fold the right side up and over the two smaller folds, so the fold line matches the one on the opposite side. Crease firmly.

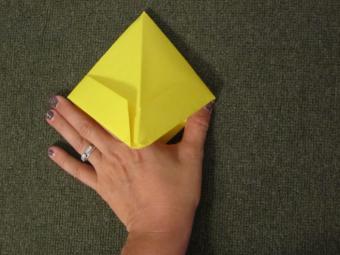
Turn the figure 90 degrees so the longest part of the triangle is at the bottom of your table, closest to you. Place your fingers in the middle of the traingle and open it up until you have a diamond shape. Crease the sides firmly once opened.

Now, fold the top half of the paper so the points meet. Turn the figure over and do the same on the backside.

The paper should now look like the triangle in the photograph to the left.

Again, slide your fingers into the middle of the triangle and open it up until it forms a diamond shape.

Carefully pull open the sides of the figure. You should have a small pointed triangle in the center of the boat as you open the sides up.

Once you have the sides pulled all the way open, it may be necessary to lay the boat flat to create a firm crease for the bottom. Then, open the boat once more so it will stand up.
Now that you've mastered a sea-faring figure, try your hand at making the perfect paper airplane to fly in the sky.