Many people enjoy having Christmas ornaments up for the season, but decorations can be quite costly. Beginner level projects let you use your paper folding skills to create inexpensive origami decor that is sure to add a festive touch to your home.
1. Easy Origami Santa
Children will love making this easy origami Santa. This model requires one square of origami paper that is red on one side and white on the other.
1. Start with the white side of your paper face up. Fold in half diagonally. Crease well, then unfold. fold in half along the other diagonal. Unfold. Turn so you have a diamond shape. Fold each side into the center to form a kite base. Fold the bottom of the kite base up to the top.

2. Flip the paper over. Fold the top of the paper down to make a white triangle. This will become Santa's face and beard

3. Fold the paper down once more to create the brim of Santa's hat.

4. Fold back the sides to create a triangle shape. Use a black fine tipped marker or ink pen to draw Santa's face. The folded sides will allow your finished origami Santa to stand upright, if desired.

2. Origami Candle
This simple origami candle model makes a lovely window decoration. It could also be incorporated into a handmade Christmas card. The model requires a square of origami paper that is yellow on one side and white or a neutral color on the other.
1. Begin with the yellow side of your paper face up. Fold your paper in half vertically, then open. Fold the edges to meet the middle crease. Fold the edges to meet the second crease one more.

2. Unfold the paper completely. Fold the top edge down as shown.

3. Unfold the paper again. Use a pair of scissors to carefully cut away three sections from the left and right side of the paper, leaving only the two sections in the middle

4. Make two small slits with your scissors at the bottom of the yellow square. Fold the sides in once more to finish the base of the candle. Flip the paper over, fold the edges of the top (the flame) into the middle and shape by folding in the corners as desired. If needed, use a glue stick to secure the flaps on the body of the candle.

3. Origami Candy Cane
This candy cane looks good enough to eat, but is actually made from a single square of origami paper that is red on one side and white on the other.
1. Begin with the white side of the paper face up. Fold in half along the diagonal. Unfold, then fold along the other diagonal. Unfold so you have an "X" shaped crease pattern. Turn the paper until you have a diamond shape in front of you. Fold the bottom up towards the top, leaving a thin white border.

2. Flip the paper over. Make a series of pleated folds starting at the base and going up the entire length of the paper. This creates the distinctive stripes of your candy cane.

3. When the paper is fully pleated, make a small diagonal fold roughly ⅓ of the way from the top to form the arch of your candy cane. Make a second diagonal fold at the end of the arch to finish the model.

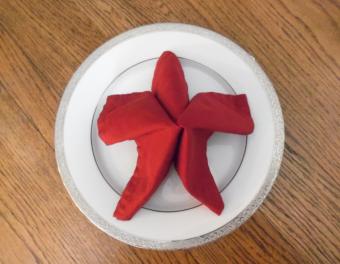
4. Origami Poinsettia
Origami flowers are a common creation for paper folders. Take it up a notch for the holidays by making a folded paper poinsettia. Use the poinsettia in place of bows on gifts or in a cluster atop a holiday gift basket.
For this project you will need three sheets of square red paper and three sheets of square green paper. The green paper squares should be twice the size of the red squares.
The reverse side of the paper will not show in this particular model, so you can use construction paper cut to size if you don't have origami paper handy.
1. Start with the red paper in front of you in a diamond shape, keeping the reverse side face up if your paper isn't the same color on both sides. Fold in half along each diagonal, unfold. Fold the top and bottom corners to the middle crease. Fold a second time to meet the middle crease.

2. Fold diagonally across the middle making the ends of your folds ¼ and ¾ of the way across the paper. Fold diagonally once more to create a double leaf shape.

3. Create two more leaf shapes. Flip all the leaf shapes over and tape them together.

4. Repeat this process with larger squares of green paper to make the poinsettia leaves. Tape or glue the red flower to the green leaves. Add a yellow button to the center using scrapbooking glue dots if desired.
5. Origami Wreath
An origami wreath is a beautiful way to greet visitors at your front door. Keep the paper decoration safe by placing it on an inner door or in the front hallway. This simple wreath design uses eight sheets of square paper. Construction paper is fine if you don't have origami paper handy. You can mix and match colors or make every unit the same color, depending upon the look you want for the finished project.
1. If your paper isn't the same color on both sides, start with the reverse side face up. Fold your square in half. Unfold. Fold the top and bottom left corners to meet the center line. Fold in half. This completes the first unit. Fold the rest of the paper in the same fashion until you have eight identical units.

2. Put two units in front of you. Use a glue stick to glue together as shown. Close the top flap when finished.

3. Continue adding other units in a similar fashion until the wreath is complete. If desired, decorate with a pretty ribbon, hand drawn embellishments, or other Christmas-themed origami models.

More Origami Christmas Ideas
Here are a few additional suggestions for Christmas-themed origami:
- Origami Stars: Learn to make modular stars, puffy 3D stars, and simple single sheet stars.
- Origami Christmas Trees: Fold three different types of paper Christmas trees, including a modular origami tree that uses the same units found in Golden Venture Folding.
- Christmas Origami Using Money: Fold trees, stars, elf shoes, elves, and wreaths from paper currency to make unique handmade gifts.
Decorating for the Holidays
Choose origami decorations that fits your folding skill set and your other purchased Christmas decorations for a cohesive holiday decorating scheme. You may wish to create a collection of several decorations using coordinated papers or create decorations of various sizes to add visual interest to your holiday display. The uses for Christmas origami decorations are limited only by your own creativity.